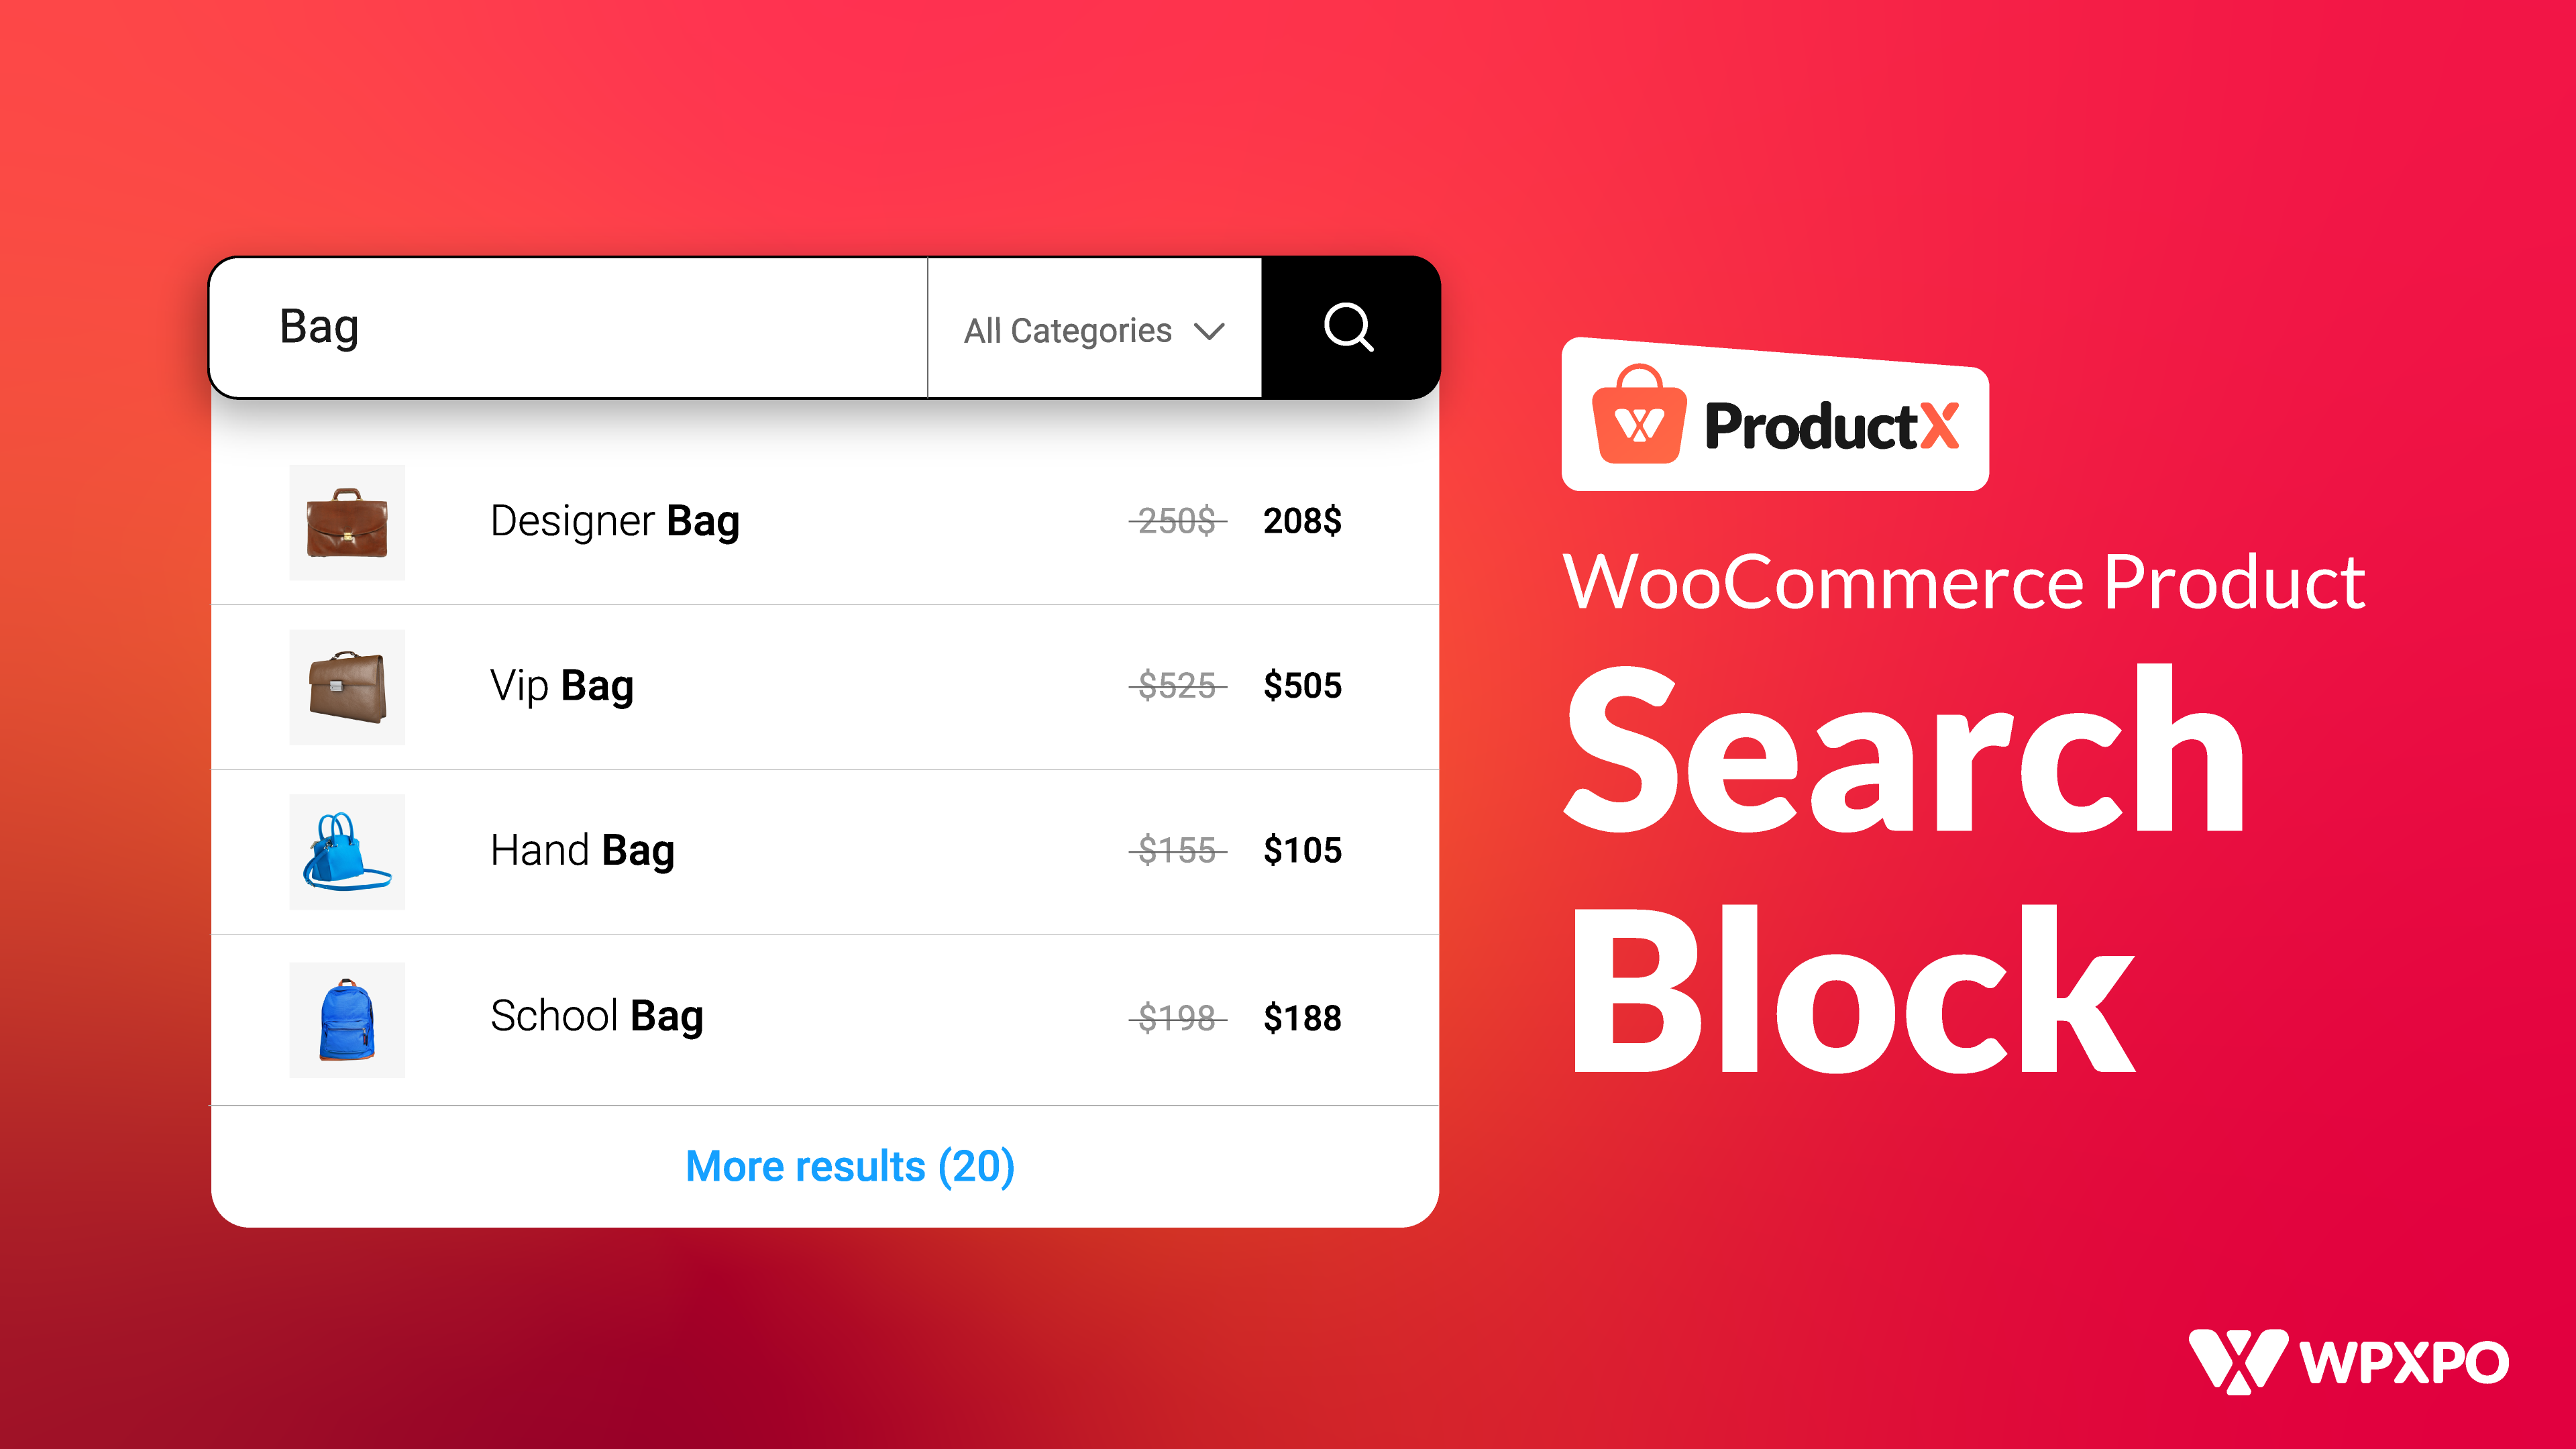
Are you looking to improve the product search in your WooCommerce store? If you want to make it easier for your customers to find what they are looking for and boost your sales, you have come to the right place!
We all know how frustrating it can be when you cannot find what you are looking for, right? By replacing the default search feature in WooCommerce with a smarter solution, you can make it easier for your customers to discover products and have a great shopping experience. In this article, we will show you how to create a more innovative and faster search experience for your online store.
We will guide you through the process step by step. So, get ready to supercharge your WooCommerce product search! By the end of this guide, you will have the things you need to take your WooCommerce product search to the next level. So, how to add WooCommerce product search? Let’s find out!
How to Add WooCommerce Product Search in a Page?
The default WooCommerce product search has limitations that can impact the effectiveness of product discovery. It may provide inaccurate results, perform slowly as the catalog grows, lack filtering options, struggle with synonyms or misspellings, and offer limited sorting options. Overcoming these limitations is crucial to improving the search experience, increasing sales, and enhancing customer satisfaction.
ProductX overcomes these limitations and allows you to make the WooCommerce product search perfect for your store. With the power of WooCommerce AJAX search and a complete set of customization options, ProductX is what you actually need. So, install ProductX to get ahead of the game.
And, as we have told earlier, let us dive into adding product search in WooCommerce without delay. There are 2 ways of using WooCommerce product search. You can use it on any page or add the search option in the Store header. We will cover both ways, so stick around until the end.
Video Guide
Here’s a video guide for you so you can have a better understanding of the advanced Product Search block of ProductX.
Step 1: Adding Product Search Block on Page
Once you have successfully installed ProductX, product search blocks are now available for use along with its extended customization. So, without further ado, let us show you how to add WooCommerce Product Search to your store.
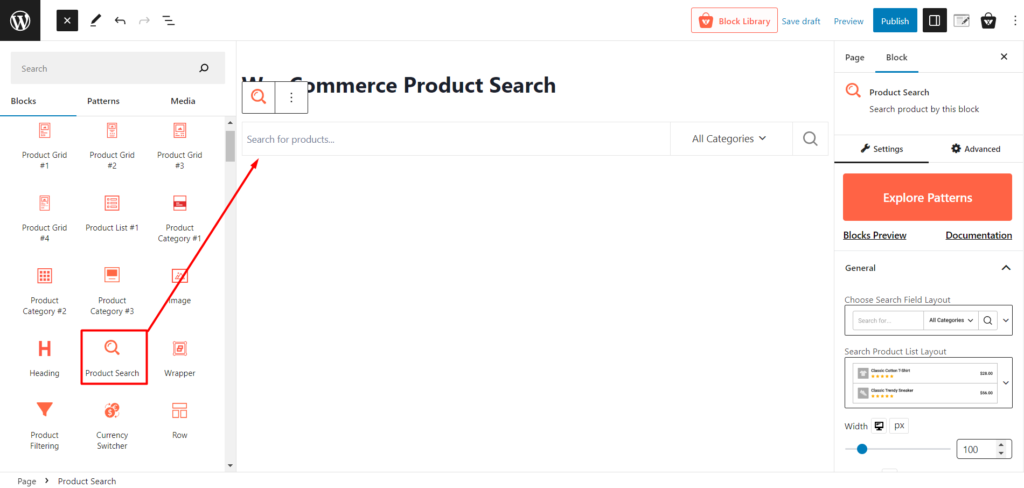
First, you need to go to a page. You can go to the WordPress page option and click Add New to create a new page. Then, search for “Product Search” to select this block. And this will add the Search block to the page.
Step 2: Customizing WooCommerce Product Search Block
After adding a product search block, you can customize it according to your needs. This block provides many customization options to make the perfect product search for your store.
Let us see the customization options you will get without any delay.
Search Field Layouts
Click on the layout option to select different layouts for your search fields. You can experiment with different layouts to find the one that best suits your website design and user experience.
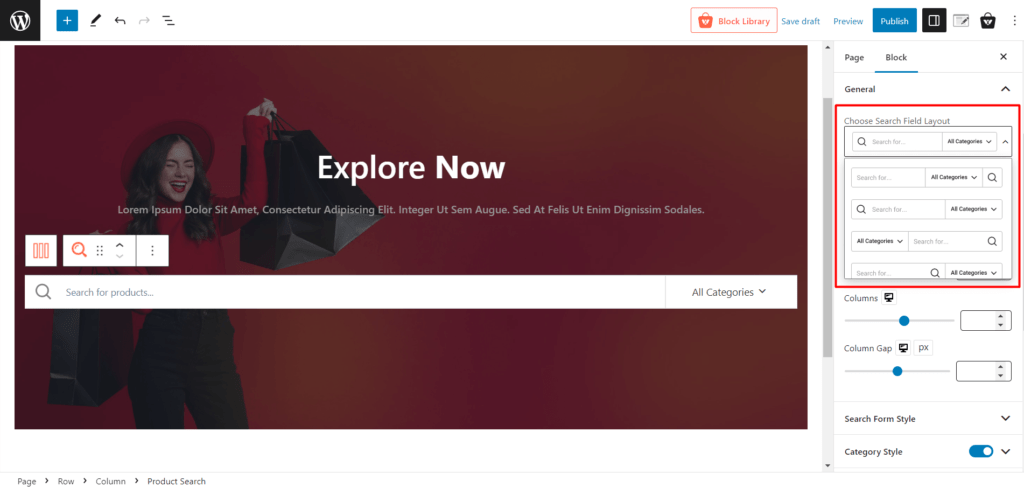
There are 5 search field layouts to choose from, and you can easily click to select the layout of your choice.
Search Product List Layouts
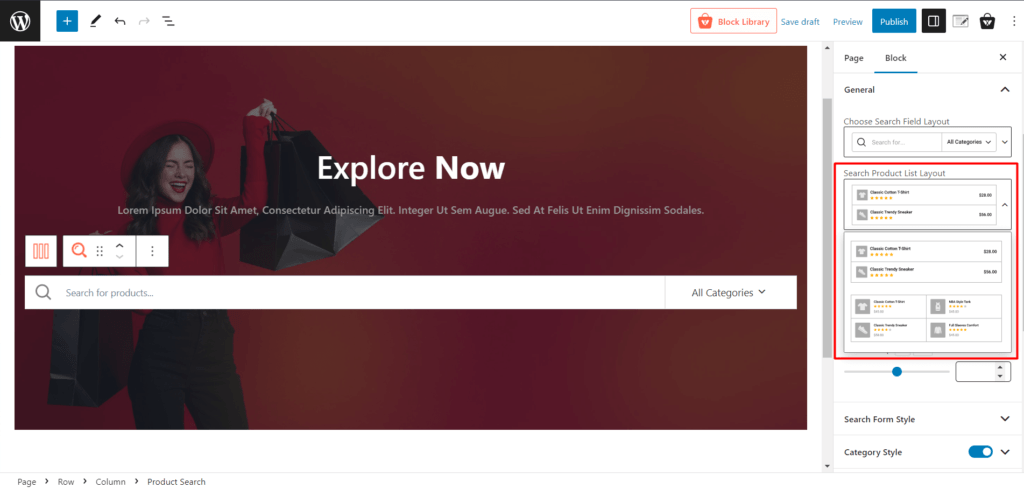
You can use the search product list layout to create a visually pleasing and organized display of your search results. You will get 3 different search product list layouts, and also adjust the width, number of columns, and column gap to optimize the arrangement of product thumbnails, titles, prices, and ratings.
Search Form Style
Use the search form style settings to modify the colors (input color and background), typography, borders, and other visual elements, like form radius and input padding of the search form.
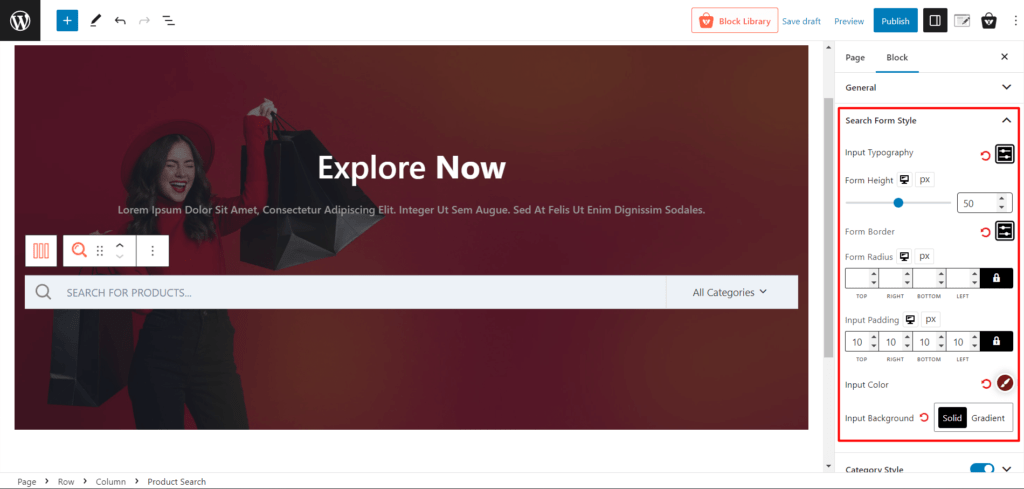
The setting panel is very intuitive, and you can select the settings of your choice to customize the adjacent settings.
Category Style
With this setting, you can customize the style of product categories displayed in the search results. Adjust the text colors, font, spacing, and layout to highlight your categories and make them visually appealing.
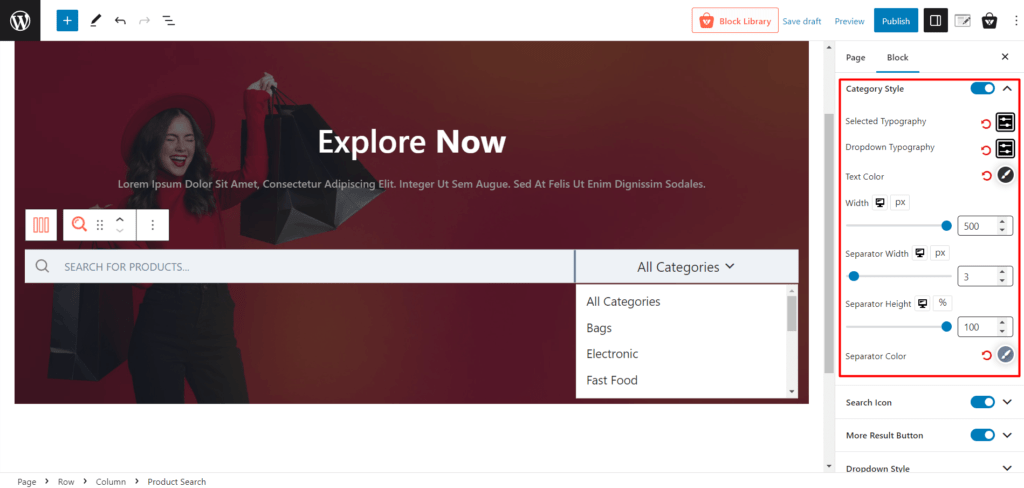
You can customize the typography option for selected text and dropdown text. Also, you can adjust the width, separator width, height, and separator colors.
Search Icon
The search icon is the most intuitive icon people use to determine a search field. From the search icon settings, you can adjust its size, colors, and background colors for normal and hover modes. Customize its radius, width, and button margins to place the search icon perfectly.
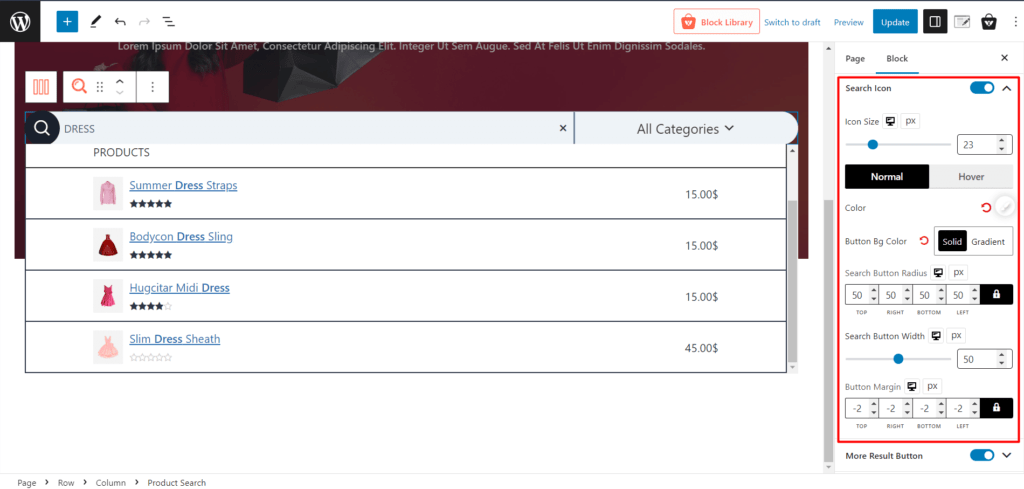
More Result Button
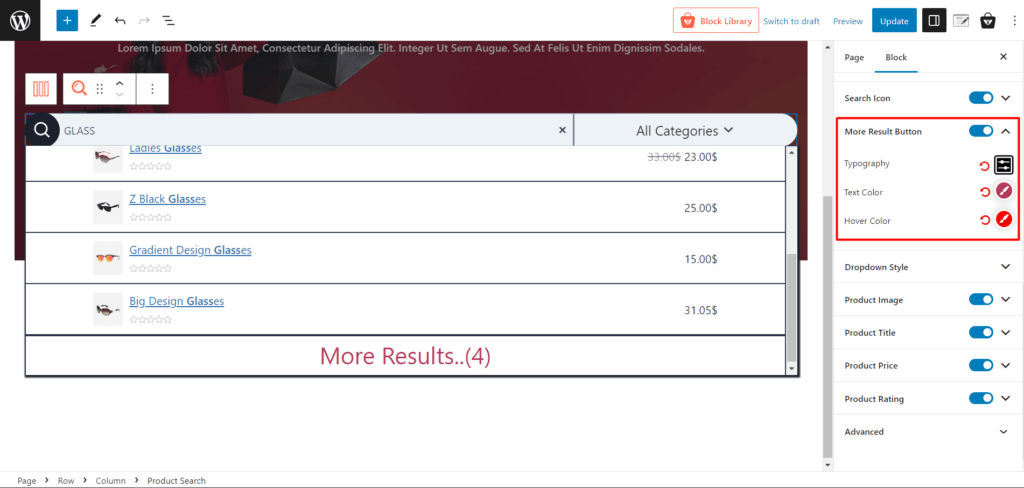
The “More Results” button allows users to load additional search results without leaving the page, providing a convenient way to explore more products. To design your product search perfectly, you can change the typography, text, and hover color from its settings.
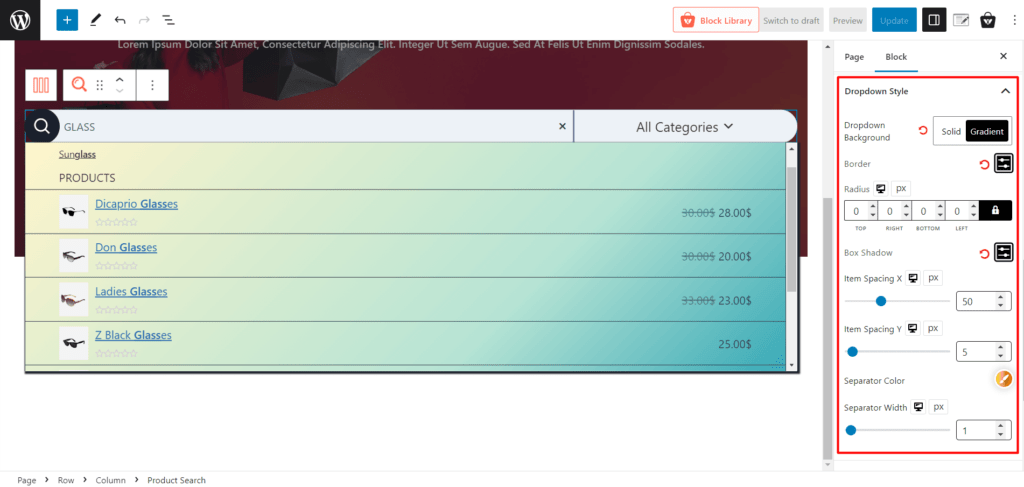
Dropdown Style
In these settings, you can customize the style of dropdown menus in your search block. Adjust colors, border, and radius. Also, you will get the box shadow setting, item spacing (X and Y), and an option to choose the separator color and adjust the separator width.
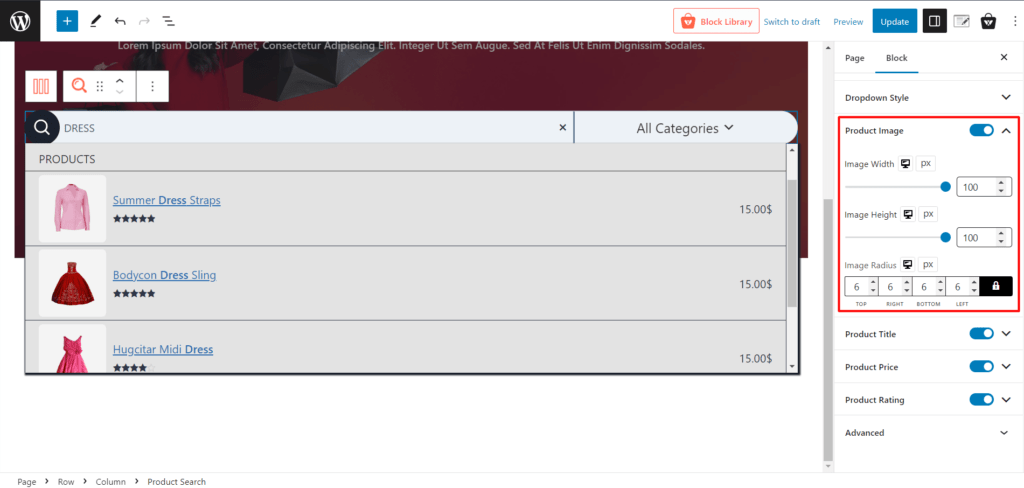
Product Image
Control the display of product images in the search results with this setting. Adjust image width, height, and radius easily with intuitive settings.
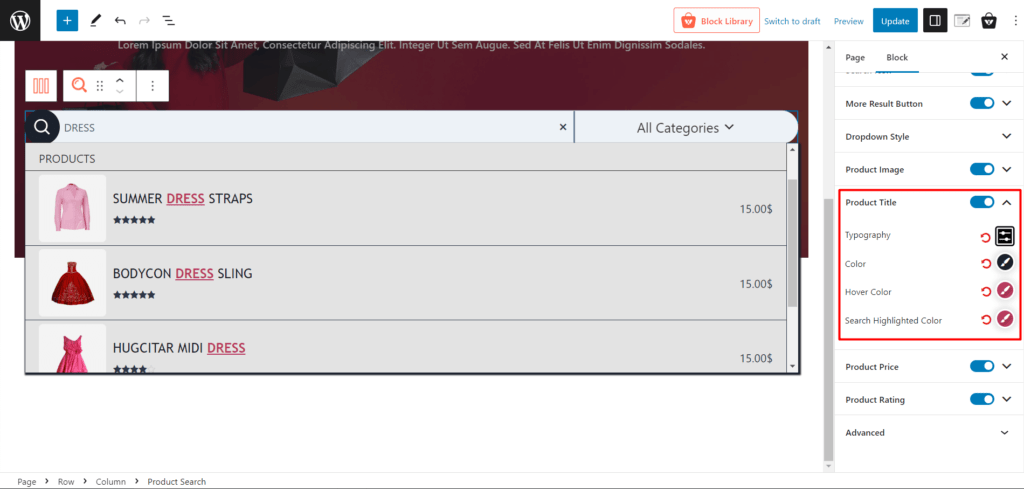
Product Title
Customize the Appearance of product titles in the search results. Modify all typography-related settings, hover color, and search highlighted color to make it look gorgeous.
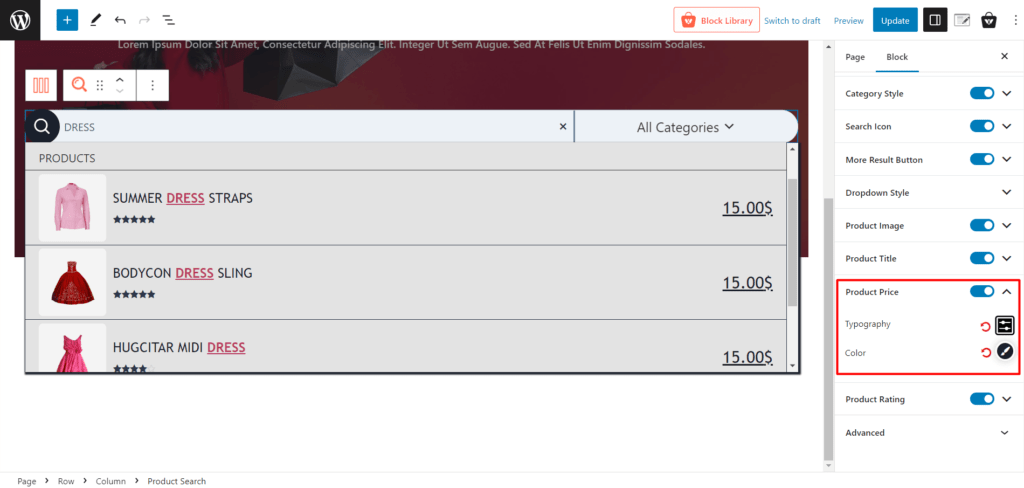
Product Price
Customize the color and necessary typography settings from here to show your product price better in the product search box.
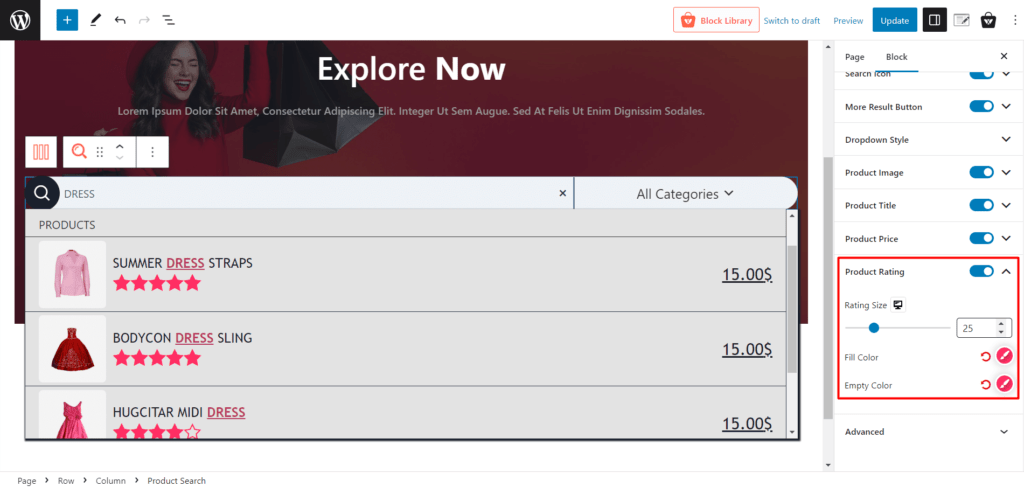
Product Rating
Control the color of product ratings in the search results. Enable or disable ratings with one click, or change the colors of your rating easily.
How to Add WooCommerce Product Search in Header
You can also add the WooCommerce product search in the header. We will show you a step-by-step guide so you can use it without any hassle.
Step 1: Create a Saved Template
First, you need to turn on the Saved Template Addon.
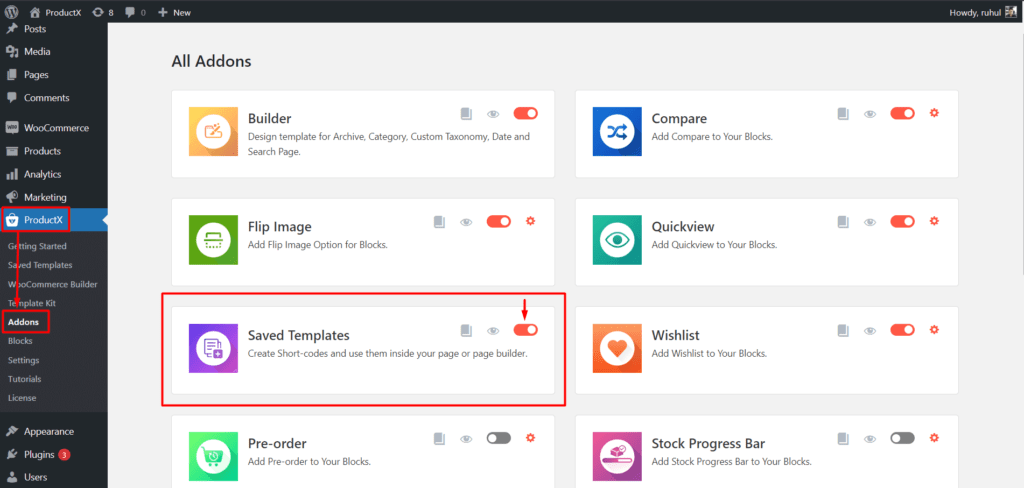
Now Go to ProductX→Saved Template. And click “Add New Template.”

Add the “Product Search Block” and customize it as needed. And then click publish.
Step 2: Copy The Shortcode
Return to the “Saved Template” page (ProductX → Saved Template). And you will see a Shortcode.
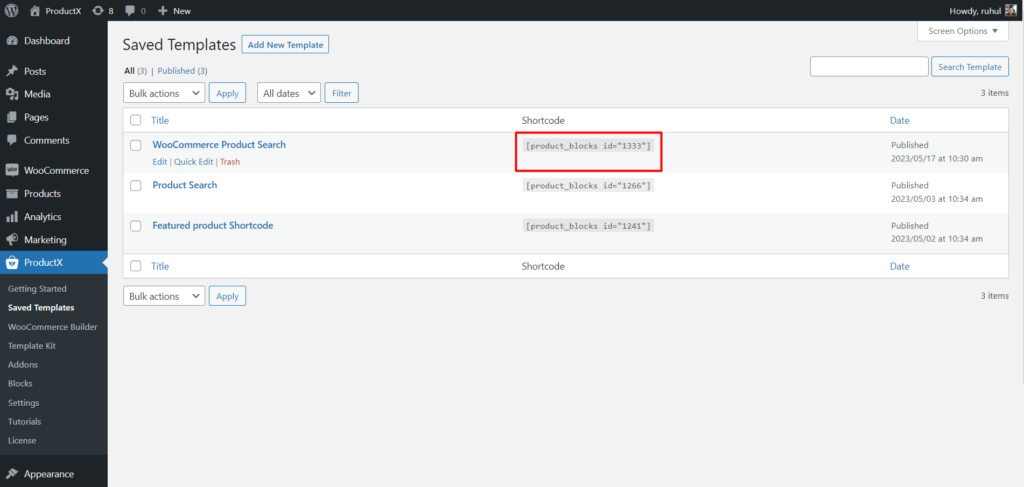
Click on the shortcode to copy it.
Step 3: Go to Theme Customizer
“Note: You can customize most themes from its customizer. And adding the WooCommerce product search can be done from the header section of a theme. Different themes might have different menu names. Today we are using the Kadence theme, for example.”
Now go to Appearance → Customize.
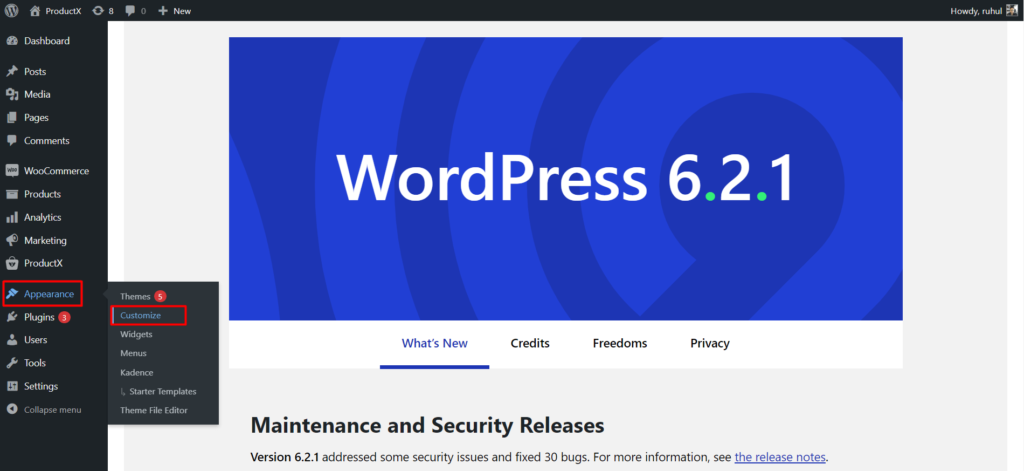
Select the “Header” to enter its settings.

Add HTML in your preferred section.
Step 4: Paste the Shortcode
Now, click on HTML and go to the Text tab. You will see a text field here.
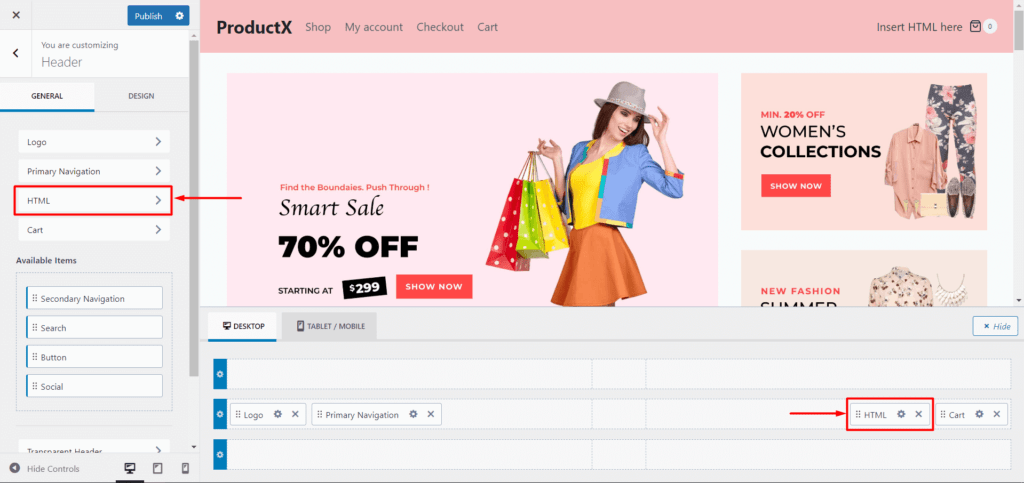
Paste the shortcode in the text field and click publish.
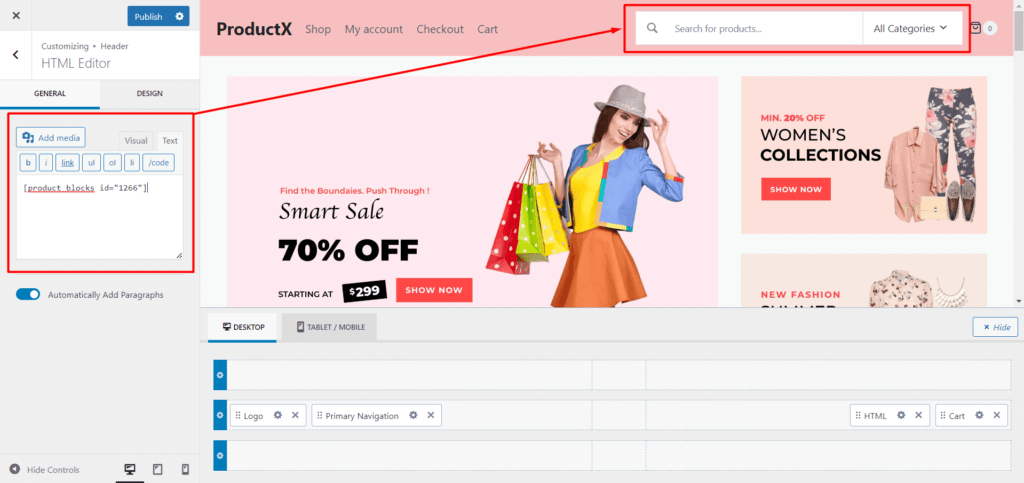
This will add the WooCommerce product search option to the header section.
Note: Different themes have different header section widths. If your product search does not fit, adjust “Width” from the general settings of the “Product Search” block.
Conclusion
In conclusion, customizing the WooCommerce Product Search Block with ProductX empowers you to control your search experience fully.
With the help of complete customization settings, you can create a tailored and visually appealing search experience for your customers.
Enhancing your product search functionality improves the user experience and increases the chances of customers finding the products they desire, ultimately leading to improved sales and customer satisfaction.
With ProductX, you can optimize your WooCommerce store and provide shoppers with an ideal and efficient search experience.
You can check out WordPress video tutorials on our YouTube Channel. Also, find us on Facebook and Twitter for regular updates!

