WordPress comes with a default home page that displays the latest posts or I would say recent posts. However, WordPress is also flexible for making a custom home page. If you are using WordPress for your blog, I am pretty sure that you have already created a dedicated home page for your blog. Well if you are a smart blogger you also have a separate page for blog posts. As it is also possible by tweaking a few settings. But only a basic posts page is not enough to satisfy the readers you also need to add a WordPress blog filter. They want more flexibility and the best way to provide flexibility is to let them filter posts by category and tags. Now you probably asking yourself, How do I add a filter to my WordPress blog?
You can easily add a filter to your WordPress blog by following 3 simple steps:
- Step 1: Create a Custom Blog Page using PostX
- Step 2: Add WordPress Blog Filter
- Step 3: Customize It According to Your Need
What is a WordPress Blog Filter?
WordPress blog filter refers to letting visitors/readers filter posts by category and tag while they are exploring a blog page. It is highly effective to increase user retention and satisfaction for those sites that have numerous posts with multiple categories and tags.
Why We Should Add WordPress Blog Filter?
Adding a WordPress filter is highly recommended to increase the total number of page views and the satisfaction level of the readers of your blog. Because if you can let your readers effortlessly find exactly what they are looking for, surely they will be satisfied and keep reading blog posts for a longer period. In short, by implementing a fileting option to your blog page, you can create a loyal user base within a short period.
Introducing PostX the Best WordPress Blog Filter Plugin
PostX is a Gutenberg Blocks-based plugin to expand the functionalities of the Gutenberg editor. However, it is not only limited to 40+ Gutenberg blocks but also all other required features that are required to create an idol WordPress blog. You can learn about all the offerings of this all-in-one solution by clicking here.
Now let’s get to the main point, PostX offers Ajax-powered filtering features with all sorts of flexibility and customization options. You can either let the readers filter posts by categories or tags. And, of course, you can customize it exactly how you want to match its colors, typography, etc with your existing blog’s standard.
How to Add and Customize WordPress Blog Filter (Step-by-Step Guide)
So you want to add filtering features to your WordPress blog page. As you have already been introduced to the PostX plugin. With this single Gutenberg plugin, you can not only add a filtering option but you can also create a visually appealing blog page. Thanks to the dynamic site builder of PostX, users can redesign their full site dynamically within a few clicks.
Now let’s dive into the step-by-step guide to create a custom Blog page along with the filtering features. But make sure you have already installed the PostX plugin on your WordPress site. After properly installing and activating the plugin, just follow the below steps.
Step 1: Create a Blog Page
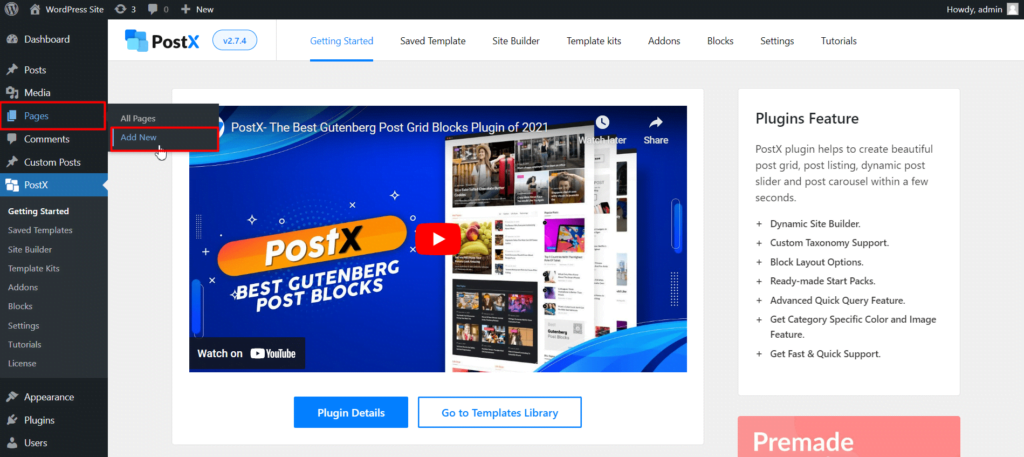
First of all, you have to create a blog page by creating a new page. For that, just go to the page section of the WordPress dashboard. Click on the “Add New” button from the page section. Give a name and publish the page. For instance, I am naming it “Blog Page”. Then just leave it there, from now on we are going to start using the PostX Dynamic Site Builder.
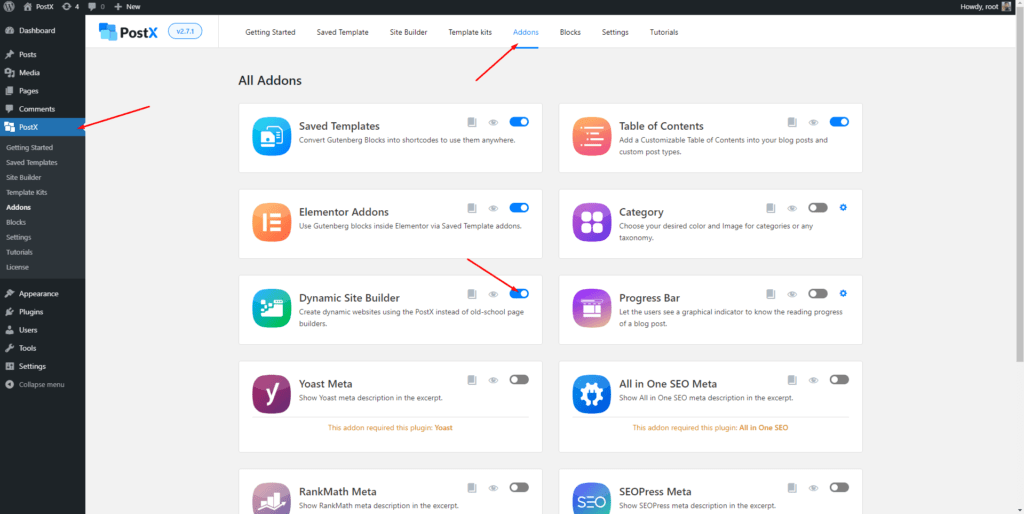
Go to the Dynamic Site Builder Section. If you can’t find it make sure you have turned it on from the All Addons section. Now, you will see all be available options to create custom pages and templates.
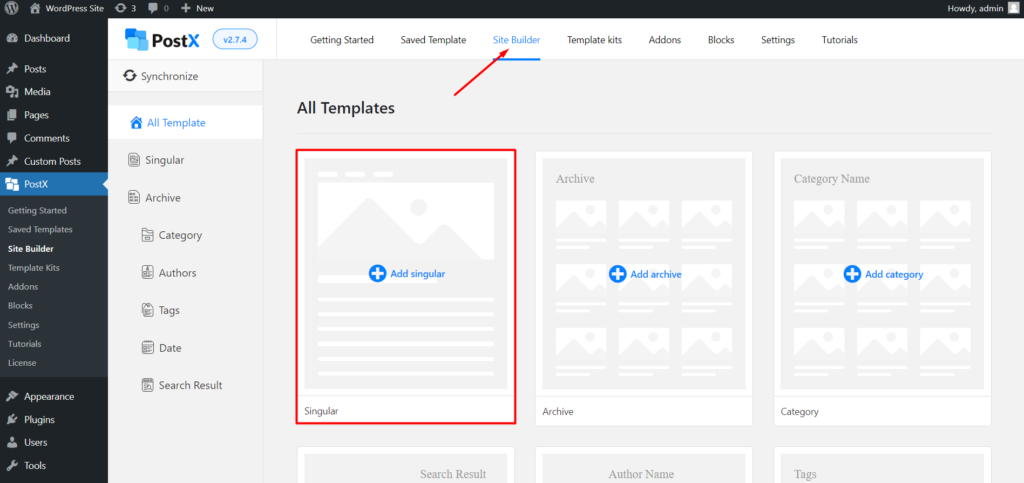
As we want to customize the blog page we have to go to the singular section. It helps to create WordPress single post templates and custom pages.
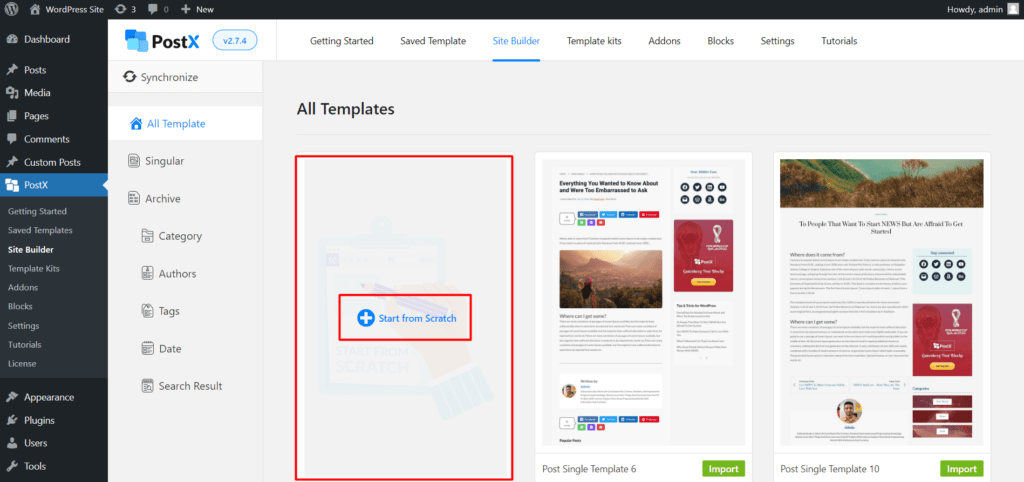
After clicking on the “Singular” options you will see various premade templates for the blog posts. But as we want to customize a page, we have to click on the “Start from Scratch” option.
Now, click on the condition selection option. And, select the page that you have already created. As I have already created a page as “Blog Page”, so I am going to select the page option and choose the page that I have created.
Now, you have to add content to the blog page. For that, PostX offers different types of blocks such as post grid, post list, post slider, heading, wrapper, etc. You can just drag and drop desired blocks to make an outstanding blog page.
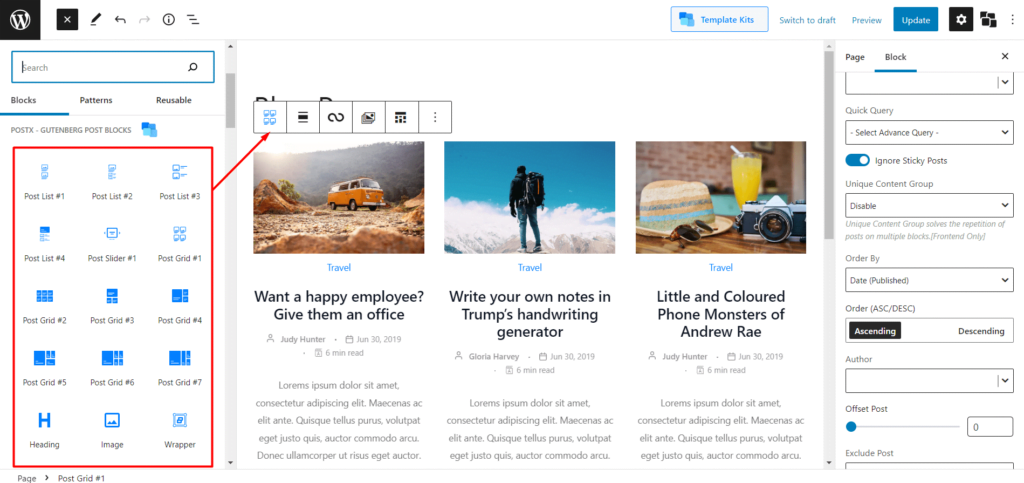
You can read out the complete guide on how to create separate page blog posts that will help you make an awesome blog page in no time.
Step-2. Add WordPress Blog Filter
Now comes the most important step of this guide which is adding a filter to the WordPress blog page. As we have already added a post block in the previous steps, we just need it to turn on the filtering option from the setting section located on the right side.
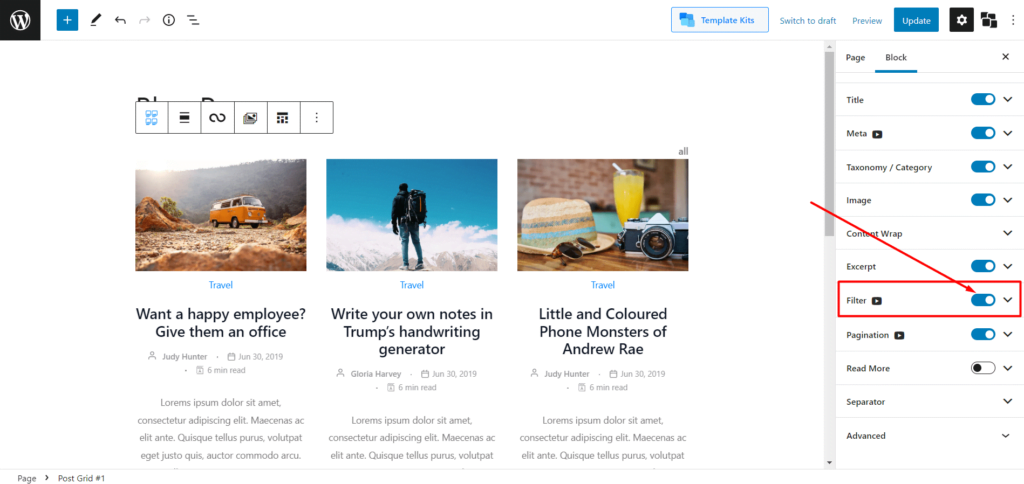
After turning on the filtering feature you all need to choose the type of filter between category and tag. After choosing the type, select your desired filtering options. For example, if you choose the category as the type of filter, then select desired categories as the filtering value and vice-versa.
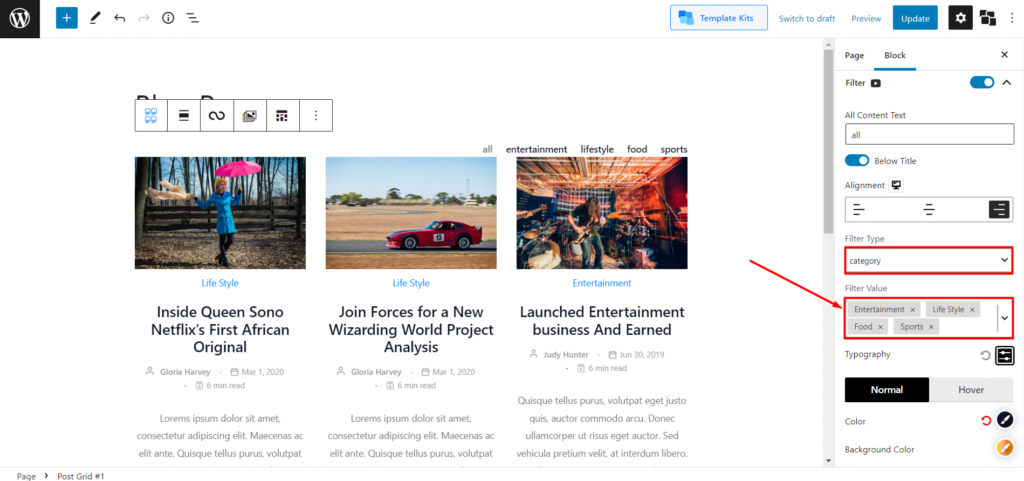
Step 3: Customize It According to Your Need
After properly, seting up the filtering options you would also want to customize it to make it perfectly aligned with your WordPress blog. Don’t worry, PostX offers you full customization freedom instead of limiting you to a few options. Explore the following customization options that are available along with the filter.
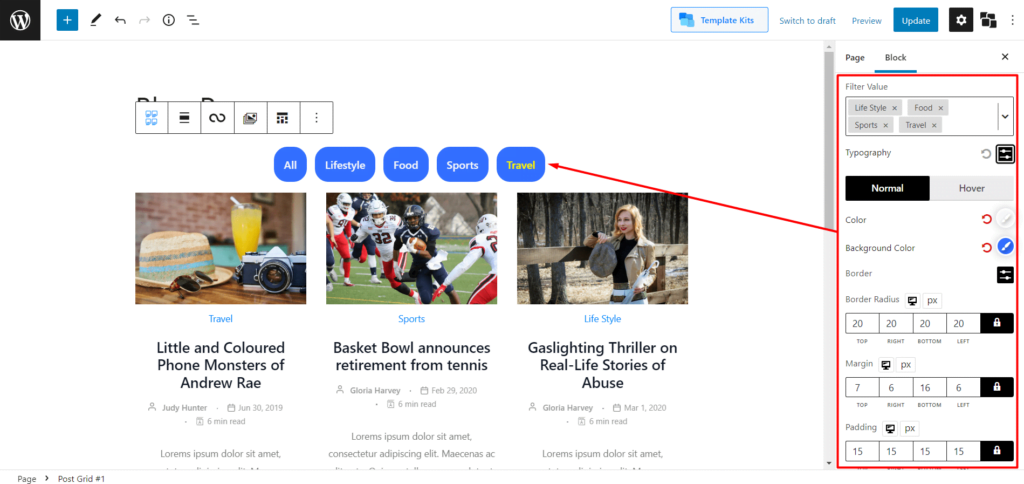
All Content Text: First of all, you can change the text of all filtering options. By default, it is set as “all” but you can change it to anything you want.
Typography: Typography is important and PostX knows it. That’s why it brings advanced typography control for you. Choose your desired google font, change the size, and make the texts upper case.
Text and Background Colors: Choose your desired colors for text, background and hover to make the filtering options visually appealing and attractive to the readers.
Adjusting Margin Padding: Last but not the least, you can also adjust margin and padding according to your need.
After customizing the filtering options according to your demand, just click on the publish button and check how it looks at the front end.
Conclusion
That’s all about the WordPress Blog filter. I hope now, you can effortlessly add filtering options to your blog page. If you face any kind of problem do let us know in the comment section.
You can check out WordPress video tutorials on our YouTube Channel. Also, find us on Facebook and Twitter for regular updates!
